

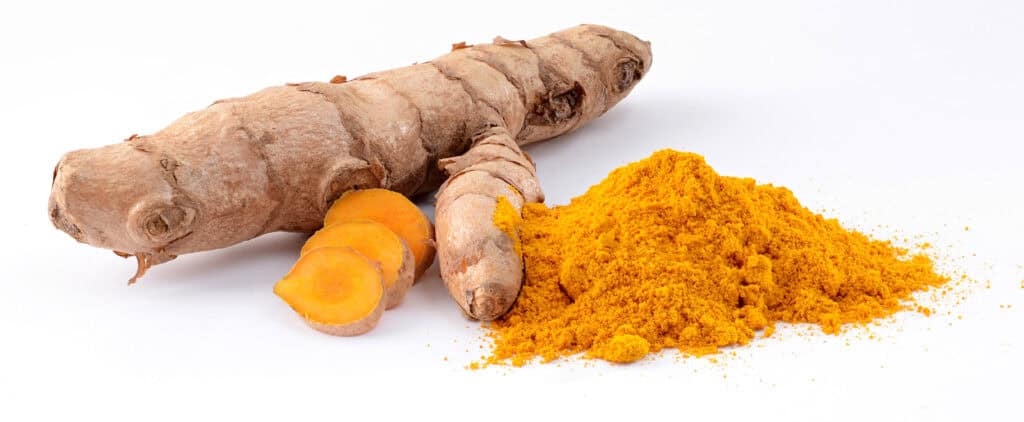
If you’ve ever wondered how to grow turmeric (Curcuma longa) at home from rhizome to harvest, I’m here to tell you it’s way easier than you might think. I started growing turmeric in my Florida backyard a few years ago, and it’s honestly become one of my favorite things to tend to. The golden rhizomes, the lush tropical leaves, and that incredible fresh-turmeric smell when you dig them up – I’m completely hooked. How to Grow Turmeric (curcuma Longa) at Home: From Rhizome to Harvest is a popular choice for gardeners.
The best part? Turmeric is a tropical plant that absolutely thrives in Florida’s warm, humid climate. If you’re in USDA zones 8 through 11, you’re already working with a huge advantage. And even if you’re in a cooler spot, you can grow it in containers and bring it inside when temperatures drop.
How to Grow Turmeric at Home: Starting With the Right Rhizome
Learning how to grow turmeric (Curcuma longa) at home from rhizome to harvest starts with finding a good rhizome to plant. You can grab fresh turmeric rhizomes from a local Asian grocery store, a farmers market, or a garden center. Look for plump, firm pieces with little nubby buds on them – those buds are where the new shoots will sprout from.
I usually pick rhizomes that are about 2 to 3 inches long with at least one or two of those little growth buds showing. If yours don’t have visible buds yet, don’t panic! Just set them in a warm spot indoors for a week or two and they’ll start to wake up on their own.
Once your rhizomes show some sprouting action, they’re ready to plant. Plant them about 2 inches deep with the buds facing up. Space them around 12 to 18 inches apart if you’re planting multiple pieces, because these plants get bushy and need room to spread out. According to the University of Florida IFAS Extension, turmeric grows well in Florida’s warm seasons and can reach 3 to 4 feet tall at maturity.
Growing Turmeric From Rhizome to Harvest: Sun, Soil, and Water
Also read: Monstera Thai Constellation Care Guide: Light, Watering, and Growth Tips
Turmeric likes bright, indirect light or partial shade – think dappled sunlight rather than harsh, direct afternoon sun. In Florida, our summer sun can be really intense, so I actually grow mine under the shade of a larger ginger plant and it does beautifully. Full morning sun with some afternoon shade is honestly the sweet spot here.
For soil, turmeric loves something rich, loose, and well-draining. I mix regular garden soil with compost and a little sand to keep things from getting too waterlogged. Soggy soil is the enemy here – if the roots sit in standing water, they’ll rot before you even get to harvest.
Watering is pretty straightforward once you get the hang of it. Keep the soil consistently moist but not soaking wet. I water mine a couple of times a week during the hot Florida summer, and I always check by sticking my finger about an inch into the soil first. If it still feels damp, I leave it alone for another day.
Caring for Your Turmeric Plant From Planting to Harvest
Once your turmeric is in the ground and growing, it’s actually pretty low-maintenance. Feed it with a balanced fertilizer every 4 to 6 weeks during the growing season. I like using a slow-release organic fertilizer worked into the top layer of soil – it keeps things simple and the plants seem to love it.
Turmeric is a heavy feeder, so don’t skip the fertilizing step. I learned this the hard way my first year when I forgot to feed mine and ended up with smaller rhizomes at harvest time. A little compost tea every few weeks works great too if you want to go the organic route.
Mulching is something I swear by, especially in Florida. A thick layer of mulch around your turmeric plants keeps the soil moisture consistent, regulates soil temperature during our hot summers, and helps suppress weeds. I use wood chips or straw and apply about 3 inches around the base of each plant.
Watch out for pests like aphids and spider mites, which can show up during dry spells. A quick spray with neem oil usually takes care of them fast. The USDA notes that turmeric plants can also be susceptible to rhizome rot in poorly draining soils, so that well-draining soil mix really does matter.
When and How to Harvest Your Turmeric Rhizomes
Here’s the moment you’ve been waiting for! Turmeric is typically ready to harvest about 8 to 10 months after planting. You’ll know it’s time when the leaves start to turn yellow and die back on their own – the plant is basically telling you it’s done for the season.
In Florida, I usually plant in spring (March or April) and harvest around November or December. The cooler weather and shorter days naturally trigger the plant to finish its cycle. I get so excited every year when I see those leaves starting to yellow because I know what’s coming.
To harvest, use a garden fork or your hands to gently loosen the soil around the base of the plant. Then carefully pull up the whole clump of rhizomes. You’ll be amazed at how much you get from a single planting – I pulled up a huge pile of golden rhizomes from just three starter pieces last year!
Rinse your rhizomes well and let them dry. Set aside some of the best-looking pieces to replant for next year’s crop. Use the rest fresh, or dry and grind them into that gorgeous golden spice powder. Fresh turmeric has such a vibrant, peppery flavor that store-bought powder honestly can’t compete with. You can learn more about turmeric’s culinary and medicinal uses on the Wikipedia page for turmeric.
Growing your own turmeric is such a rewarding experience from start to finish. Once you see those first green shoots pushing up through the soil, you’ll be completely charmed. The plants are beautiful, the harvest is generous, and using your own homegrown spice in the kitchen feels absolutely incredible.
So if you’ve been curious about how to grow turmeric (Curcuma longa) at home from rhizome to harvest, I hope this gives you the confidence to just go for it! Grab a few rhizomes, get them in some good soil, and enjoy the process. I promise you won’t regret it – happy growing!
