
If you’ve ever wanted to learn how to grow turmeric (Curcuma longa) at home: complete guide from rhizome to harvest style, you are in the right place! I started growing turmeric a few years ago in my Central Florida garden, and honestly, it’s become one of my absolute favorite plants. It’s beautiful, it’s useful in the kitchen, and it’s surprisingly easy to grow once you know what it needs. How to Grow Turmeric (curcuma Longa) at Home: Complete Guide From Rhizome to Harvest is a popular choice for gardeners.
Turmeric is that bright orange spice that makes curries golden and golden milk lattes so good. But fresh turmeric from your own garden? It’s on a whole other level flavor-wise, and you’ll feel so proud every time you dig up those gorgeous rhizomes.
Getting Started: Choosing Your Rhizomes and Planting for a Complete Turmeric Harvest
The first step in growing turmeric at home is getting your hands on good rhizomes. You can sometimes find them at Asian grocery stores or health food shops, but I’d really recommend buying from a garden supplier so you know they haven’t been treated with growth inhibitors. Look for plump, firm rhizomes with little nubby buds on them. Those buds are where the shoots will come from, so the more buds, the better!
Timing matters a lot here. In Florida, I plant my turmeric in spring, usually around March or April, when the soil has warmed up nicely. If you’re in a cooler climate, wait until after your last frost and soil temps are consistently above 65°F. Turmeric loves warmth, so don’t rush it.
Before planting, I like to pre-sprout my rhizomes indoors for a couple of weeks. Just lay them in a warm, humid spot and wait for those little green shoots to appear. It gives them a head start and speeds up the whole process once they’re in the ground.
Plant your rhizomes about 2 inches deep with the buds facing up, spacing them around 12 to 18 inches apart. They need room to spread out underground as they multiply. I’ve made the mistake of planting them too close together, and trust me, it gets crowded fast!
Sun, Soil, and Water: The Complete Care Guide for Growing Turmeric at Home
Related article: How to Fix Common Alocasia Problems: Drooping Leaves, Root Rot, and the One Leaf Club
Turmeric is a tropical plant, so it genuinely thrives in Florida’s heat and humidity. It does best with partial shade to filtered sunlight. Full blazing sun all day can scorch the leaves, especially during our brutal Florida summers. I tuck mine under a tall ginger plant and a banana tree, and they seem perfectly happy there.
For soil, turmeric wants something rich, loose, and well-draining. I mix in plenty of compost before planting because these plants are hungry feeders. Heavy clay soil is a no-go since the rhizomes need room to expand and the roots hate sitting in soggy conditions. The University of Florida IFAS Extension has great resources on soil prep for tropical plants if you want to dig deeper into that.
Watering is where a lot of beginners go wrong. Turmeric likes consistent moisture, but not waterlogged soil. I water mine deeply about twice a week during the growing season and back off a bit as the plants start to die back in fall. Think of it like this: moist but never muddy.
Feed your turmeric every few weeks with a balanced fertilizer or a good layer of compost. I’ve had great results with a slow-release organic fertilizer worked into the soil at planting time, then a liquid feed every month through summer.
What to Expect as Your Turmeric Grows: From Rhizome to Harvest
Once your turmeric gets going, it’s honestly a joy to watch. Those first little green shoots poking up through the soil are so exciting! The plants grow into tall, lush clumps with big tropical leaves, reaching anywhere from 3 to 4 feet tall. In Florida, my plants look absolutely lush by midsummer.
Don’t be alarmed if nothing seems to happen for the first few weeks after planting. Turmeric is slow to emerge, and it can take 6 to 8 weeks before you see any shoots. I always mark where I planted mine so I don’t accidentally dig them up thinking nothing happened!
The plants will flower occasionally, producing pretty cone-shaped blooms in white, pink, or pale yellow. The flowers are actually edible and look gorgeous as a garnish. It’s a nice bonus on top of the rhizomes you’re growing for the kitchen.
You’ll know harvest time is getting close when the leaves start to yellow and the stems begin to flop over and die back. This usually happens around 8 to 10 months after planting. In Florida, that puts harvest time somewhere in late fall or early winter, which works out perfectly. The USDA plant database has some great info on turmeric’s growing habits if you want to learn more about the plant itself.
Harvesting, Storing, and Replanting Your Turmeric
Harvesting turmeric is genuinely one of the most satisfying things in gardening. Once the foliage has died back, carefully dig up the whole clump with a garden fork. Try to go wide around the plant so you don’t accidentally slice through the rhizomes. I always gasp a little at how much the plant has multiplied underground!
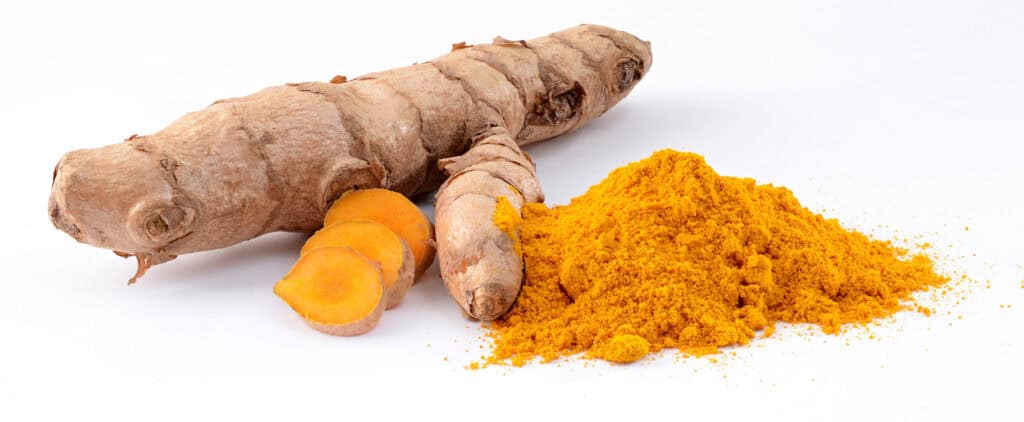
Brush off the soil and take a good look at what you’ve got. You’ll have a central mother rhizome surrounded by lots of new “fingers.” Snap off what you want to use in the kitchen and set aside the healthiest-looking pieces to replant for next year’s crop. I always save more than I think I need because it feels great to share extras with friends.
For storing fresh turmeric, keep it in the fridge wrapped in a paper towel inside a bag for up to 2 weeks. For longer storage, you can freeze it whole, and it actually grates really easily straight from frozen. You can also dry and grind it into powder, though the drying process takes some patience.
To replant, just store your saved rhizomes somewhere warm and dry until spring, then start the whole process again. It really does get easier every year as you learn what works in your specific garden.
Growing turmeric is one of those things that feels almost magical once you see it through from start to finish. You start with a little knobby root and end up with a beautiful plant AND a kitchen full of fresh spice. I hope this complete guide from rhizome to harvest gives you the confidence to give it a try this season!
Learning how to grow turmeric (Curcuma longa) at home is so worth the patience it takes. Drop any questions in the comments below – I love hearing how your gardens are growing!
