
Chitting seed potatoes in February is one of my favorite ways to get excited about the growing season ahead. This simple process involves encouraging your seed potatoes to sprout before planting, giving them a serious head start. I’ve been doing this for years, and it makes such a difference in how quickly my potatoes get established. Chitting Seed Potatoes in February is a popular choice for gardeners.
The best part about chitting is that it’s basically foolproof. You’re just creating the perfect conditions for those little eyes on your potatoes to wake up and start growing. Here in Florida, February is the perfect time to start this process since we’ll be planting our potatoes much earlier than gardeners up north.
What Is Chitting Seed Potatoes and Why February Matters
Chitting is simply the process of pre-sprouting your seed potatoes before you plant them in the ground. You place them in a cool, bright spot and wait for the eyes to develop into sturdy little shoots. I like to think of it as giving your potatoes a gentle wake-up call after their winter rest.
February timing is perfect because it gives your potatoes about 4-6 weeks to develop good shoots before planting time. In Florida, we typically plant potatoes in March or early April, depending on your exact zone. The cooler February temperatures are ideal for slow, steady sprouting rather than the rapid growth you’d get in warmer months.
I learned about chitting from my grandmother, who swore it was the secret to her amazing potato harvests. She was right! Chitted potatoes emerge from the soil faster, establish stronger root systems, and often produce better yields than potatoes planted directly from storage.
The science behind it makes perfect sense too. When you chit seed potatoes, you’re essentially giving them time to break dormancy gradually. This means they’re ready to hit the ground running instead of spending weeks underground just figuring out it’s time to grow.
Setting Up Your Chitting Seed Potatoes in February
You might also enjoy: Starting Cool-season Vegetables Indoors in January for Early Spring Harvests
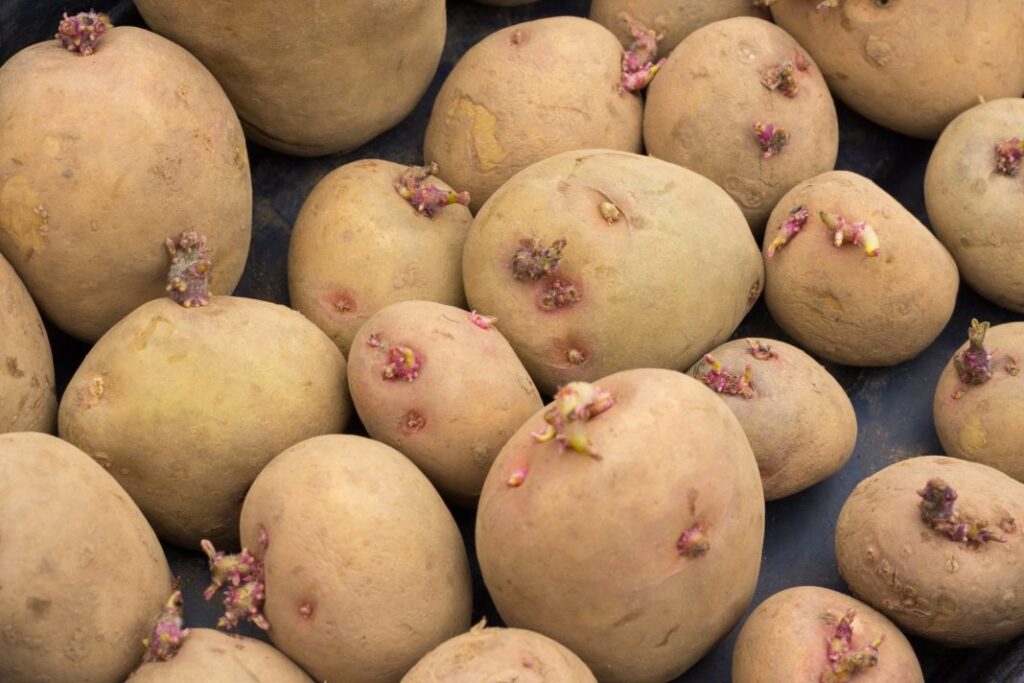
Getting your setup right is super important for successful chitting. I use old egg cartons or seed trays, placing each potato with the “rose end” facing up. The rose end is where most of the eyes are clustered, usually the more rounded end of the potato.
Find a spot that gets bright, indirect light but stays cool. I use my screened porch here in Florida, which gets great light but doesn’t get too warm during February days. You want temperatures around 50-60°F if possible, though slightly warmer is okay in our climate.
Check on your potatoes every few days and give them a quarter turn. This helps the shoots develop evenly instead of all leaning toward the light source. I love watching the progress, especially when those first little purple or green shoots start poking out.
Don’t worry if some potatoes sprout faster than others. Different varieties have different sprouting speeds, and even potatoes from the same batch can vary. Just be patient and let them do their thing at their own pace.
Caring for Your Chitting Potatoes Through February
The key to successful chitting seed potatoes in February is maintaining consistent conditions without babying them too much. I check mine every couple of days, mainly to make sure they’re not getting too dry or developing any soft spots. If you notice any potatoes starting to shrivel or feel squishy, remove them immediately.
Good air circulation is important, especially in Florida’s humidity. I space my potatoes so they’re not touching each other, and I sometimes run a small fan nearby on particularly humid days. You don’t want any moisture building up around the potatoes.
Light is crucial, but direct Florida sun can be too intense even in February. I’ve made the mistake of putting them in full sun, and the shoots grew too fast and weak. University extension services recommend bright, indirect light for the strongest shoot development.
If your shoots get longer than about 2 inches, they’re ready to plant or can wait a bit longer. I prefer shoots that are sturdy and about 1-2 inches long because they’re less likely to break during planting. Longer shoots work fine, you just need to be extra gentle when handling them.
Common Mistakes and Troubleshooting Tips
One mistake I see gardeners make is keeping their potatoes too warm during the chitting process. Warm temperatures cause weak, spindly growth that breaks easily. If your February weather is unusually warm, try to find the coolest bright spot you can, maybe even bringing them indoors during the hottest part of the day.
Another common issue is not having enough light. I tried chitting potatoes in my garage once, thinking the cool temperature was more important than light. Big mistake! The shoots were pale, weak, and stretched out looking for light. Always prioritize bright conditions over slightly cooler temperatures.
Don’t panic if some of your seed potatoes don’t sprout at all. This happens sometimes, especially if the potatoes are older or have been stored in less-than-ideal conditions. Just plant the non-sprouted ones anyway – they might surprise you and grow just fine.
Watch out for green potatoes during the chitting process. If your potatoes start turning green from too much light exposure, they’re developing solanine, which is toxic. Green potatoes should not be planted or eaten because of this natural toxin.
Starting your chitting seed potatoes in February sets you up for gardening success all season long. The extra time and attention you give them now pays off with stronger plants and better harvests later. I promise you’ll love watching those little shoots develop and knowing you’re getting ahead of the growing season.
Don’t stress if this is your first time trying it – chitting is very forgiving, and even imperfect results usually lead to good potato crops. Give it a try this February and see how much difference it makes in your garden!
